Contents
- Google Veo: A Technical Deep Dive for the AI Director
- The Latent Space: A Strategy of Efficiency
- The Diffusion Process: Denoising to Reality
- The Transformer: Modeling the Language of Time
- The Essential Elements
- Adding Cinematic Control: The Modifiers
- Example Prompt Breakdown
- Character Consistency: Defeating “Identity Drift”
- Scene and Narrative Consistency
- Brand Consistency
- Shot 1: The Establishing Shot
- Shot 2: The Discovery
- Shot 3: The Clue
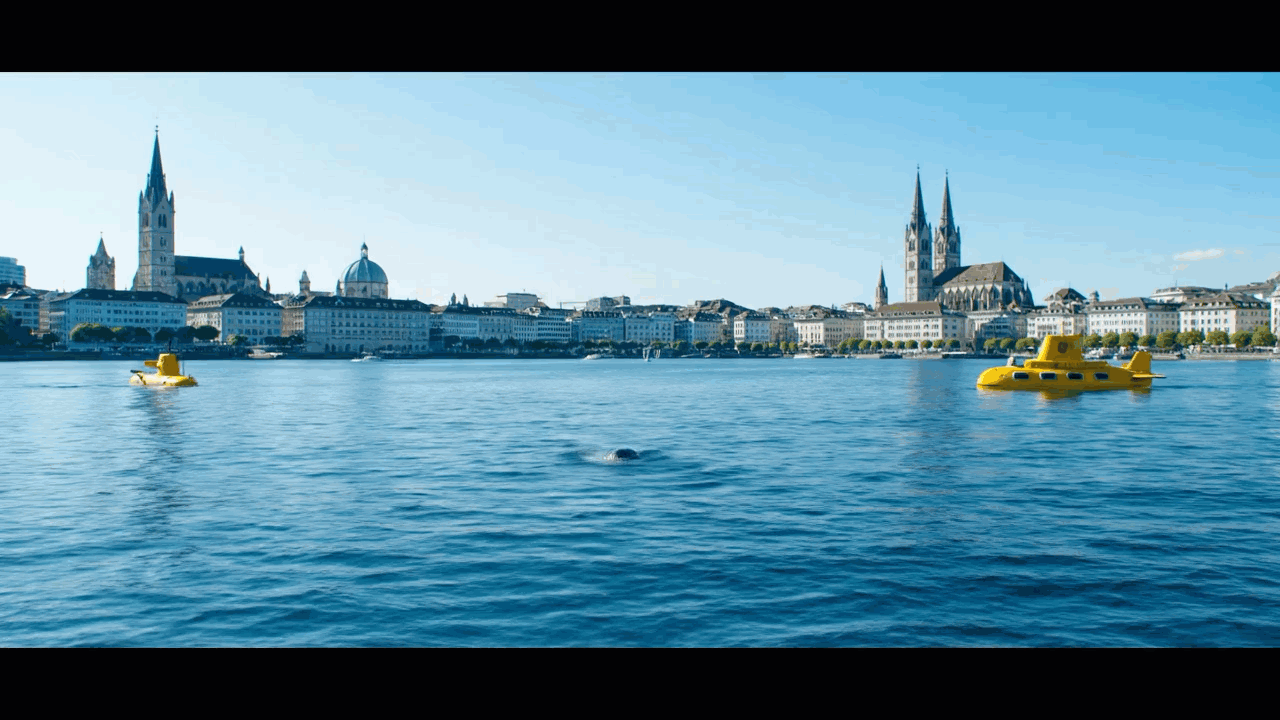
Video 1: Submarines and a whale in Zurich Lake (Image by Author).
Google Veo: A Technical Deep Dive for the AI Director
| |
|
An In-Depth Guide to the Architecture, Prompting, and Workflows Behind Google’s Generative Video Model
The leap from static images to dynamic, coherent video has long been a formidable benchmark for generative AI. With the introduction of models like Google’s Veo, we’re witnessing a paradigm shift. This isn’t just about creating moving pictures; it’s about enabling a new form of procedural cinematography, where creators can direct complex scenes through language. For developers, creatives, and data scientists, understanding the engine under the hood is crucial to harnessing its full potential and moving from being a mere user to a true AI director.
This article provides a technical deep dive into Google Veo. We’ll deconstruct its architecture, move on to foundational prompting strategies, and culminate in advanced techniques for achieving the holy grail of AI video: consistency in characters, scenes, and branding. We will also walk through a practical multi-shot workflow and explore the emerging hybrid approach of combining generation with powerful editing tools, a process that is set to define the next generation of digital content creation.
Deconstructing Veo — The Architecture of Motion
At its core, Veo is a sophisticated generative model capable of producing high-definition video from a variety of inputs, including text, images, or a combination of both. Its ability to generate up to 1080p resolution footage that can extend beyond a minute, complete with an emergent understanding of real-world physics and cinematic techniques, stems from its powerful and efficient architecture: a Latent Diffusion Transformer.
Let’s break down this trifecta of concepts, as understanding each piece is key to understanding Veo’s capabilities and limitations.
The Latent Space: A Strategy of Efficiency
Processing raw video data — a sequence of high-resolution pixel grids — is computationally astronomical. To solve this, Veo employs a latent diffusion model (LDM). The process begins with a specialized autoencoder, which consists of two parts: an encoder and a decoder.
The video encoder takes raw video frames and compresses them into a lower-dimensional, information-dense representation known as the latent space. This process intelligently strips out redundant visual information while preserving the essential features of the scene, objects, and their movement over time. Think of it as creating a highly detailed blueprint of the video rather than working with the raw, heavy bricks and mortar. This isn’t just a smaller file; it’s a structured, semantic map of the video’s content.
By operating within this compressed latent space, the computationally intensive diffusion process becomes drastically more manageable, enabling the generation of high-resolution video without requiring prohibitive amounts of processing power.
The Diffusion Process: Denoising to Reality
The generative heart of the model is diffusion. It’s a two-part process that allows the model to learn and then create complex data structures.
- Forward Process (Training): During training, the model takes the clean latent representations of video and systematically adds Gaussian noise over a series of steps until nothing but random noise remains. This teaches the model the statistical structure of video data at every level of detail, from broad compositions down to fine textures. It learns what “video-ness” looks like at every stage of clarity.
- Reverse Process (Inference): The model then learns to reverse this process. At inference time, it starts with a random noise tensor and, guided by the user’s prompt (which is also converted into a mathematical representation), it iteratively applies a learned denoising function. Step by step, it removes the noise, sculpting the random tensor into a clean latent representation that reflects the prompt’s content. It’s akin to a sculptor who knows precisely where to chisel a block of marble to reveal the statue within.
This denoising process is what “creates” the video. The final clean latent is then passed to the decoder (the other half of the autoencoder), which upscales it back into the full-resolution video we see.
The Transformer: Modeling the Language of Time
The critical component executing this reverse-denoising process is a Transformer-based denoising network. Transformers, with their self-attention mechanism, are unparalleled at modeling complex, long-range dependencies within sequential data. Unlike older models that could “forget” what happened early in a sequence, a Transformer can pay attention to all parts of the input at once. This makes them perfectly suited for the temporal nature of video.
To make the data compatible, Veo “tokenizes” the compressed latent space, turning the spatio-temporal data into a sequence that the Transformer can process. This allows the model to understand not just what’s in a single frame, but how objects should consistently evolve and interact over time. This leads to more coherent and physically plausible results like realistic water ripples, consistent character motion, or fabric movement that reacts to a character’s actions. This unified architecture is what allows Veo to follow complex, multi-scene narrative prompts and understand cinematic language like “timelapse” or “drone shot.”
The Art of Direction — Foundational Prompting
If Veo is the film crew, your prompt is the screenplay and the director’s shot list rolled into one. Effective prompting moves beyond simple descriptions to a form of procedural direction. A well-structured prompt is built on several core components that, when combined, give the model a clear and unambiguous set of instructions.
The Essential Elements
Based on official guidance and community best practices, every foundational prompt should contain these four elements:
Subject: Who or what is the focus? Be specific and descriptive. The more detail you provide, the less the model has to guess.
- Instead of: “a man”
- Try: “a grizzled, elderly fisherman with a thick white beard and a worn, yellow raincoat.”
Action: What is the subject doing? Crucially, focus on a single, clear action or “beat.” Trying to chain multiple actions in one prompt (e.g., “a man walks in, sits down, and drinks coffee”) can confuse the model.
- Instead of: “a dog runs and jumps”
- Try: “a golden retriever leaps gracefully through the air to catch a red frisbee.”
Context (Scene): Where and when is this happening? Describe the environment, time of day, and atmosphere to ground your subject in a believable world.
- Example: “A misty, ancient redwood forest at dawn, with golden sunbeams filtering through the dense canopy.”
Style: The overall aesthetic. This is where you define the look and feel, referencing artistic movements, film techniques, or even specific hardware.
- Examples: “cinematic, shot on 35mm film with anamorphic lenses,” “Studio Ghibli-inspired animation,” “hyperrealistic, Unreal Engine 5 render,” “grainy found footage from a 1990s VHS tape.”
Adding Cinematic Control: The Modifiers
To elevate your output from a simple clip to a cinematic shot, you must direct the camera and ambiance with specific keywords.
Camera Motion: Be explicit. If you want movement, specify it.
-
pan,tilt,dolly-in,tracking shot,crane shot,handheld micro-shake,whip pan,slow push-in
Camera Framing: How is the subject framed? Use standard filmmaking terminology.
-
wide shot,medium shot,close-up,extreme close-up (ECU),over-the-shoulder (OTS),point-of-view (POV)
Camera Angle: What is the camera’s perspective? This has a powerful psychological effect.
-
low angle(makes the subject look powerful) -
high angle(can make the subject seem small or vulnerable) -
eye-level,bird's-eye view,dutch angle
Ambiance & Lighting: Control the mood with color and light. Be evocative.
-
warm golden hour lighting,cool blue tones of twilight,dramatic high-contrast film noir lighting,soft, diffused light from an overcast sky,caustic reflections from water.
Example Prompt Breakdown
Let’s combine these into a powerful, directorial prompt.
Weak Prompt:
A car driving in the city at night.
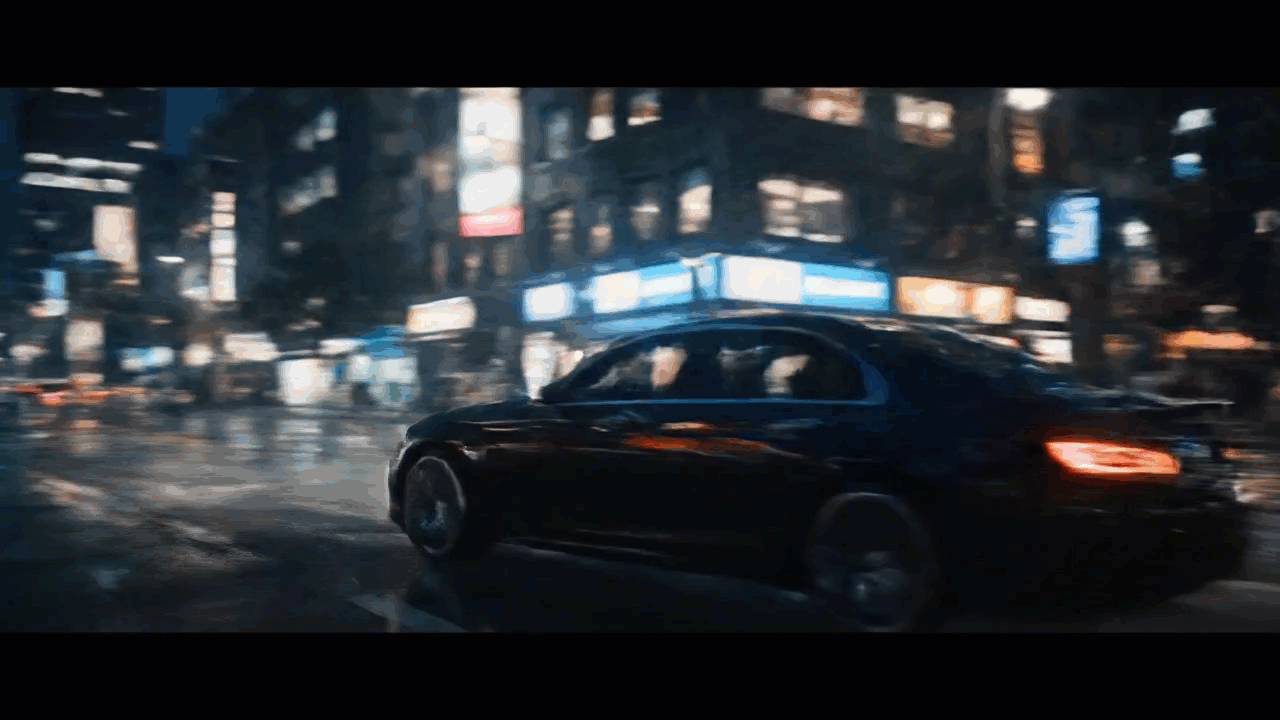
Video 2: Weak Prompt (Image by Author).
Strong, Directorial Prompt:
Cinematic wide shot of a vintage 1980s sports car, gleaming cherry red, speeding through a rain-slicked neon alley at night. The camera tracks smoothly alongside the car. Moody, high-contrast film noir lighting with reflections of pink and blue neon signs on the wet asphalt.
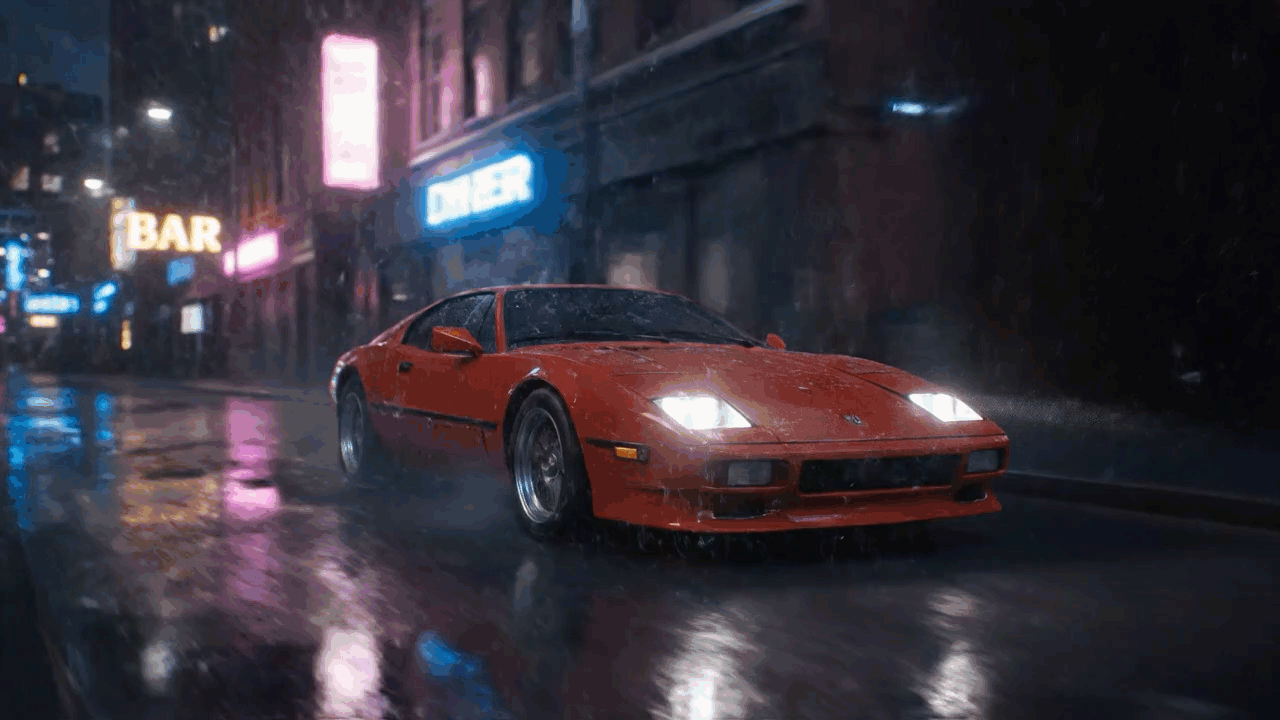
Video 3: Directoral Prompt (Image by Author).
Advanced Techniques for Cinematic Consistency
The most significant challenge in multi-shot AI video generation is consistency. A character’s face changing mid-scene or a setting’s style drifting breaks the narrative illusion. Here are systematic strategies to combat this.
Character Consistency: Defeating “Identity Drift”
The Challenge: AI models are generally stateless. They interpret each prompt independently and have no “memory” of the character they generated in the previous shot. This leads to “identity drift,” where features, clothing, or even ethnicity can change from one shot to the next.
Solution 1: The Character Bible
Your most powerful tool is a “character bible” — a highly detailed, reusable block of text that defines your character.
-
Create a Detailed Description: Go beyond the basics. Describe facial structure (
oval face, prominent cheekbones, aquiline nose), specific features (a small scar above the left eyebrow), hair (wavy, shoulder-length auburn hair), and wardrobe (a well-worn, dark brown leather jacket over a grey Henley shirt). The more unique and specific the details, the stronger the anchor. - The Verbatim Rule: This is critical. Copy and paste the exact same character block into every single prompt where that character appears. Do not paraphrase or shorten it. The model interprets your prompt as a set of tokens; changing even one word creates a different input and can lead to a different output.
- Prioritize the Block: Place the character description prominently at the start of your prompt to give it maximum weight in the model’s attention mechanism.
Character Bible Example:
CHARACTER: A woman in her late 20s named Elara. She has an oval face with prominent cheekbones, deep blue almond-shaped eyes, and a constellation of light freckles across her nose. Her hair is wavy, shoulder-length, and auburn. She wears a well-worn, dark brown leather jacket over a grey Henley shirt and dark-wash jeans.
You would then append scene-specific descriptions to this block for each shot.
Solution 2: Image-to-Video Anchoring
For even greater control, use a multi-modal approach by providing visual conditioning.
- Generate a Still Image: Use a powerful image model (like Google’s Imagen) or even Veo itself to generate a perfect still frame of your character using your detailed “character bible” prompt. This is your “master reference.”
- Use as a Reference: Feed this generated image into Veo along with your text prompt for the video scene. The image acts as a powerful visual anchor, significantly reducing identity drift and ensuring the model adheres to the established look.
Scene and Narrative Consistency
The Challenge: Creating a coherent, multi-shot narrative where the environment, style, and lighting remain consistent.
Solution 1: One Beat Per Prompt
This is the cardinal rule of AI storyboarding. Do not try to describe an entire sequence in one prompt. Break your narrative down into individual shots or “beats,” with each prompt generating a single, short clip (e.g., 5–8 seconds). This gives you maximum control over the final edit.
Solution 2: Lexicon and Style Block Consistency
Just like the character bible, create a reusable “Style Block” for your scene.
Style Block Example:
STYLE: Cinematic, shot on 35mm film with a 2.35:1 aspect ratio. Color graded with a palette of muted earth tones and cool blues. Lighting is soft, natural, and atmospheric, mimicking an overcast winter morning. A light film grain is visible.
Paste this exact block into every prompt within the sequence. Furthermore, reuse the same core nouns and adjectives for the setting (e.g., always call it a “minimalist Scandinavian kitchen,” not just “a kitchen”).
Solution 3: Motivated Transitions
Direct your transitions to create a seamless flow. End one prompt on an action that begs for a continuation and start the next by fulfilling it.
-
Prompt 1 (ends with):
...Elara turns and exits the frame to the left. -
Prompt 2 (begins with):
Medium shot. Elara enters the frame from the right, now walking down a dimly lit hallway...
Brand Consistency
The Challenge: Ensuring AI-generated content aligns perfectly with a brand’s specific visual identity (VI), color palette, and tone.
Solution: Combine the techniques above to create a “Brand VI Block.”
-
Define the Visuals: Codify your brand’s style. Include the color palette (you can even reference hex codes, though mileage may vary), lighting style (
bright, clean studio lighting), camera style (stable tripod shots, no handheld motion), and overall tone (energetic and upbeat,serious and professional). - In-painting and Editing: For product placements, Veo’s editing capabilities will be key. You can generate a scene and then use in-painting or masking to specifically edit or insert a branded product, ensuring it looks seamlessly integrated. This provides a level of granular control that pure text-to-video cannot match.
Practical Workflow — Storyboarding a Multi-Shot Scene
Theory is one thing, but execution is another. Let’s walk through a concrete example of creating a short, three-shot narrative sequence using the consistency principles we’ve discussed.
The Concept: A detective, Elara, finds a crucial clue in a rain-soaked alley at night.
First, we establish our reusable “bibles” for the character and the scene’s style. This “pre-production” step is vital.
Character Bible:
CHARACTER: A woman in her late 20s named Elara. She has an oval face with prominent cheekbones, deep blue almond-shaped eyes, and a constellation of light freckles across her nose. Her hair is wavy, shoulder-length, and auburn. She wears a well-worn, dark brown leather jacket over a grey Henley shirt and dark-wash jeans.
Style Bible:
STYLE: Cinematic film noir. Moody, high-contrast lighting with deep shadows. The scene is set in a rain-slicked city alley at night, with reflections of pink and blue neon signs on the wet asphalt. Shot on 35mm film with a gritty, textured feel.
Now, we storyboard our sequence, one beat per prompt.
Shot 1: The Establishing Shot
Goal: Introduce the character and setting.
Prompt:
_[CHARACTER BIBLE]_+_[STYLE BIBLE]_+ Wide shot. Elara walks slowly into frame from the left, her face determined as she scans the ground. The camera tracks smoothly with her movement.
Shot 2: The Discovery
Goal: Show the character finding something. This shot uses a motivated transition from Shot 1.
Prompt:
_[CHARACTER BIBLE]_+_[STYLE BIBLE]_+ Medium shot. Elara stops and her eyes fix on something on the ground. She crouches down slowly, her hand reaching out towards the pavement just out of frame.
Shot 3: The Clue
Goal: A close-up reveal of the clue.
Prompt:
_[CHARACTER BIBLE]_+_[STYLE BIBLE]_+ Extreme close-up from an over-the-shoulder (OTS) perspective. Elara’s fingers gently pick up a small, tarnished silver locket from a puddle on the asphalt. The reflection of neon signs is visible on the locket’s surface.
By pasting the verbatim bibles into each prompt and breaking the narrative into distinct, connected beats, we create a coherent sequence where the character, location, and aesthetic remain consistent.
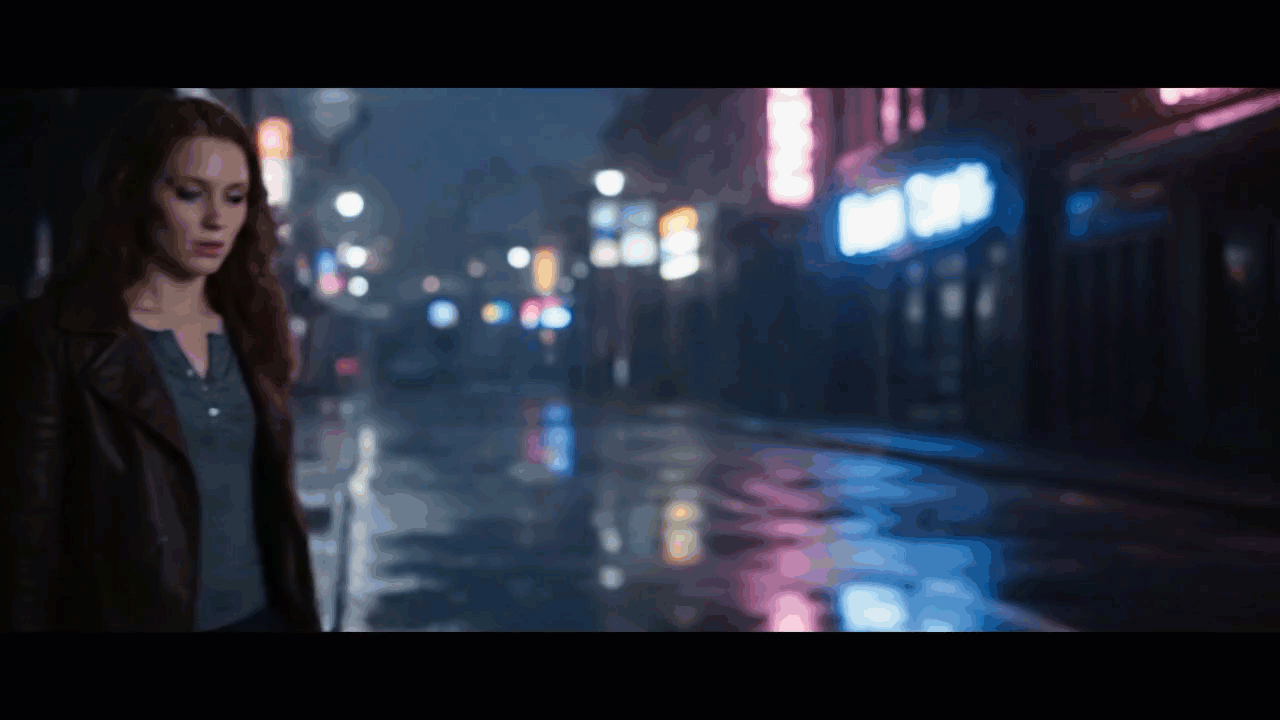
Video 4: Storyboarding a Multi-Shot Scene (Image by Author).
The Hybrid Workflow — Generation Meets Editing
While text-to-video generation is incredibly powerful, the future of professional AI filmmaking lies in a hybrid workflow that combines generation with precise editing tools. Veo isn’t just a generator; it’s a component in a larger creative pipeline that will likely integrate with tools like Adobe After Effects or DaVinci Resolve.
The core idea is to use the generative model for the “heavy lifting” — ideation, animation, and complex textures — and then use editing features for refinement and control.
The Process:
- Generate the Base Layer: Use the prompting techniques described above to generate your primary video clip. Focus on getting the motion, composition, and overall feel right. Don’t worry about small imperfections.
- Masking for Targeted Edits: Once you have your clip, you can use masking to isolate specific regions of the video over time. For example, if a character’s logo on their shirt flickers or a background object looks out of place, you can draw a mask around that area.
- In-painting and Out-painting: With a mask applied, you can issue a new prompt to regenerate only the masked area. This is where the true power lies.
-
In-painting (Correction): Use this to fix artifacts. If a character’s hand looks unnatural, mask it and prompt for “
a realistic human hand, fingers slightly curled.” The model will regenerate the hand while keeping the rest of the scene intact. You can even use it for subtle performance changes, like masking a character’s mouth and prompting for a “slight smile.” -
In-painting (Addition): Use this for product placement. Mask a table and prompt for “
a can of branded 'Starlight Soda' sitting on the table.” This allows for perfect, on-brand object insertion. - Out-painting (Extension): This feature allows you to extend the frame of the video, generating new visual information beyond the original boundaries. This is perfect for changing aspect ratios (e.g., converting a 16:9 shot to a 9:16 for social media) or creating a wider, more panoramic shot from an existing clip.
This hybrid approach offers the best of both worlds: the speed and creativity of AI generation with the precision and control of traditional post-production, enabling a much higher standard of final output.
The Future is Direction
Google Veo and models of its caliber represent a fundamental shift. The bottleneck is no longer the technical ability to create pixels, but the creative and technical skill to direct the AI. The skillset of a modern creator is evolving from one of pure technical execution (e.g., mastering complex 3D software) to one of detailed creative specification and curation. By understanding the underlying architecture, adopting a systematic, directorial approach to prompting, and embracing a hybrid workflow that combines generation with editing, creators can move from generating novel curiosities to producing deliberate, consistent, and compelling cinematic narratives.
The age of the AI Director has arrived, and it promises to democratize storytelling in ways we are only beginning to imagine.
Contacts
If you want to keep updated with my latest articles and projects follow me on Medium and subscribe to my mailing list. These are some of my contacts details:
